Wednesday, March 31, 2010

Tropical Oats

You've got to plan ahead a little for this, because the oats need to be soaked over night.  The soaking aids in digestion, and it really ups the creaminess factor.  And who doesn't want a decadent creamy breakfast that tastes sinful but is actually good for you?

I used to be afraid of coconut milk.  It's high in fat, and it's caloric.  I started doing a lot of research, and I discovered that the fat is the good kind of fat, and that not only is coconut milk not bad for you, it's actually really pretty healthy.
 If you are concerned about the saturated fat content in coconut milk, know that this saturated fat has been shown in many independent studies to be a good saturated fat, easily metabolized to give your body quick energy. Contrary to popular myth, it does not transform into bad cholesterol to clog up arteries. In fact, cultures around the world that depend on coconut as their main source of fat have been found to be free of heart disease. The principle fatty acid in coconut milk is lauric acid, which is the same fat found in abundance in mother's milk and is known to promote normal brain development and contribute to healthy bones. It also has important anti-carcinogenic and anti-pathogenic properties and is less likely to cause weight gain than polyunsaturated oils.

The potent anti-viral, anti-fungal and anti-microbial effects of coconut oil have implicated it in the treatment of both AIDS and Candida. Whatever bad things you may have heard or read about coconut milk have not stood up to scrutiny by unbiased food scientists; however, the goodness of coconut milk has not been given equal press because of intensive lobbying against it by the powerful vegetable oil industry. Southeast Asians, meanwhile, have been staying healthy for generations with coconut an integral part of their diet. 

Now, a word about dried fruit:  for heaven's sake dehydrate it yourself!  If you're not going to do that, at least go on a hunt for fruit dried WITHOUT sulfur dioxide.  It's more expensive, and it's also worth it.  Sulfur dioxide is found in pretty much all commercially packed dried fruits, and it's TERRIBLE for you.  It's been known to cause asthma and other breathing difficulties in children, and in rare cases, even death.  It's produced by volcanoes, for goodness sake.  Volcanoes don't tend to be very good for our health!
[Sulfur Dioxide] is produced industrially as a bleach alternative, a reducing agent, and for sulfites (preservation). As it has no role in humans or mammalian biology, when introduced it inhibits specific nerve signals, restricts lung performance, and is a direct allergen - over 65% of asthmatic children sensitive to SO2 (World Health Organization, 1999), and negatively affects over 70% of children with behavioral problems.

...

Sulphur dioxide is still being used as a food preservative in many common snack foods despite being one of the top two air pollutants in urban areas, a corrosive gas, a primary cause of haze and acid rain, and a cause of respiration problems, lung disease, early death (due to a thiamine deficiency), documented water and plant damage, cardiovascular disease, blood toxication, developmetal toxication, gastro-intestinal and liver disease, neurological disturbances, irritable bowel syndrom, behavior disturbances, skin rashes, asthma, folic acid deficiency, as well as a nose and ear irritant. During the 1970's and 1980's over one hundred deaths were attributed to the addition of sulphur dioxide in foods including meat with twelve deaths occurring as a result of restaurants spraying salad bars with this poisonous gas.

The entire article is HERE at the Raw Guru.  It's worth the read.  Educating yourself about what you put into your body is always a good thing!
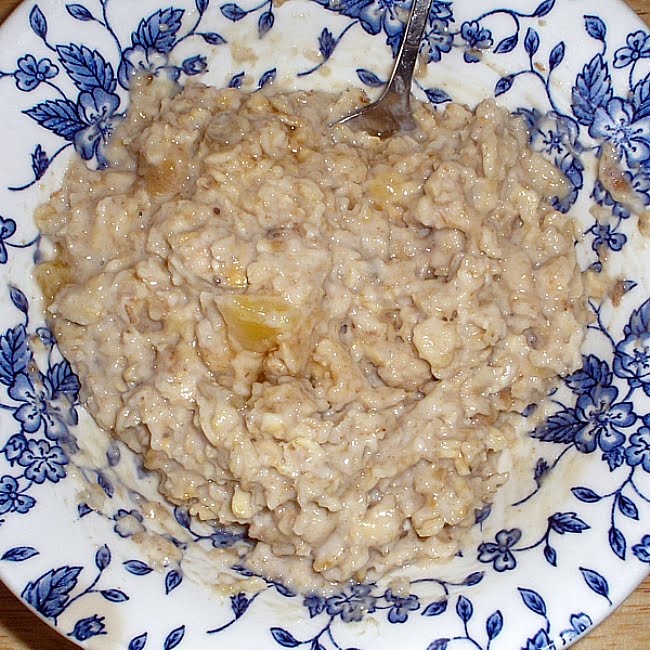
Tropical Oats

Ingredients:
  • 1/2 cup rolled oats OR 1/4 cup steel cut oats
  • 1/2 cup coconut milk
  • 1/2 teaspoon vanilla extract
  • 1 tablespoon maple syrup or agave nectar
  • 1/4 cup mixed tropical dried fruit (I used banana, mango, and guava that I dehydrated myself.)
Directions:
  1. The night before, soak the oats and the fruit in the coconut milk.
  2. In the morning, place the oats in a saucepan, adding water to reach desired consistency.  If you used steel cut oats, you will need to use enough water to thin it out substantially, as they must simmer longer than rolled oats.
  3. Bring to a simmer, stirring frequently.
  4. Add the vanilla and sweetener.
  5. Cook for about 3 minutes for rolled oats or about ten minutes for steel cut oats, stirring often, until oats are gently bubbling.  Add water as needed.
  6. Pour into a bowl and top however you would like.  Roasted almonds or walnuts are good.  A dollop of yogurt works.  You can drizzle with a bit more coconut milk, if you'd like.  Most of the time I just eat mine with no topping.  It's already a sweet, creamy, rich breakfast.

Enjoy!

Tuesday, March 30, 2010

Grain and Lentil Salisbury Steak with Gravy

Vegan Salisbury Steak!  What?  Unpossible, you say?!  Well, actually I say so too, but nonetheless, these are really quite good.  They're flavorful, have a chewy, toothsome texture, and they're quite filling.  I only had one with a spoonful of mashed potatoes, and that was plenty of dinner for me.  Made with brown rice and lentils, they're full of fiber, low fat, and low calorie.

This is totally not my recipe, though it's been tweaked a bit in order to suit my own tastes.  I don't have any idea where I originally found this recipe, so I'm unable to credit the author.  If anyone recognizes it, feel free to point me in the right direction.

Grain and Lentil Salisbury Steak

Ingredients for patties:
  • 1/4 cup cooked lentils, choose your color (I used a mixture of brown and red)
  • 1/2 cup whole oats
  • 1 1/4 cups cooked brown rice
  • 2 TBSP wheat germ
  • 2 TBSP vital wheat gluten
  • 1 TBSP ground flax seed
  • 1 1/2 tsp chili powder
  • 1/4 tsp poultry seasoning
  • 1/4 tsp black pepper
  • 1/4 tsp kosher salt
  • 1 tsp garlic powder
  • 1 tsp onion powder
  • 1 1/2 TBSP soy sauce
Ingredients for gravy:
  • 1/2 medium white onion, chopped
  • 3 large cloves garlic, finely chopped (I am from the school of "there's no such thing as too much garlic".  If you're not, you probably want to decrease the amount used.)
  • 1 TBSP tomato paste
  • 1/2 TBSP soy sauce
  • 2 TBSP whole wheat flour
  • 1 1/4 cups water
  • 1/2 tsp onion powder
  • Salt and pepper to taste
Directions:

1.  Prepare skillet by spraying with olive oil and sprinkling with 1/2 TBSP soy sauce.

2.  In a food processor, coarsely chop oats, rice, and lentils, chopping them up, but NOT pureeing them.


3.  Transfer to a large mixing bowl and add wheat germ, vital wheat gluten, ground flax seed, chili powder, poultry seasoning, salt and pepper, garlic powder and onion powder, and soy sauce.

4.  Kneed ingredients with your hands until well combined.  At first it will seem to be very crumbly and like it isn't going to stick together.  Just keep at it.  The kneading will activate the vital wheat gluten, and it will become cohesive.

5.  Split mixture into five equal parts.

6.  Heat the skillet on medium low.

7.  While skillet is heating, shape portioned mixture into oval shaped patties and place into skillet.  Add 1 TBSP of water and cover.  Cook first side five minutes.


8.  Flip patties, add 1 more TBSP of water, cover and cook patties for five minutes more.

9.  Remove patties from skillet and set aside.

10.  Turn heat up to medium, mist pan with olive oil, and add onions.  Stir frequently until onions are translucent and begin to brown around the edges.

11.  Add garlic and sauté for one minute more.

12.  In a blender put tomato paste, soy sauce, flour, water, onion powder, and salt and pepper to taste.  Blend until smooth and well combined.


 13.  Pour into skillet, stirring together with onions and garlic, and bring to a boil, stirring constantly until thickened.


14.  Add patties back to the pan and cover with gravy.


15.  Cook over low heat until patties are warmed through.


Enjoy!

Sweet Potato Muffins

A good for you muffin?  No way!  It's a dream come true, if you dream about such things.  A perfect handheld snack you can grab on the way out the door to the gym or even as a breakfast if you're running late for work.

I LOVE sweet potatoes.  I could eat them every day of my life and not get tired of them.  It's a real bonus that they're one of the highest ranked vegetables on the nutrition scale.  They're a superfood, high in fiber, Vitamin A, Vitamin C, Vitamin B6, potassium and manganese. They can also help stabilize blood sugar, which means they're a good choice for diabetics, and by stabilizing blood sugar levels, they curb the appetite longer. They can satisfy a sweet tooth, and they're rich in antioxidants and have anti-inflammatory properties. There's just nothing bad about a sweet potato, and best of all they're relatively low in calories for all of the nutritional power they pack.

Turning a sweet potato into a healthy muffin is a snap.

Sweet Potato Muffins

Ingredients:
  • 2 cups whole wheat flour
  • 1/2 cup raw sugar (in the name of all that is holy, don't use that refined white crap!)
  • 1 TBSP baking powder
  • 1/2 tsp baking soda
  • 1/2 tsp salt
  • 1/2 tsp cinnamon
  • 1/4 tsp nutmeg
  • 1/4 tsp ground cloves
  • 1 3/4 cups cooked chopped sweet potatoes (baking is the best way to bring out the sweet taste and creamy texture, but if you're in a hurry, boiling them will work)
  • 1/2 cup water

Directions:
  1. In a large bowl mix flour, sugar, baking powder, baking soda, salt, cinnamon, nutmeg, and cloves.
  2. Mash sweet potatoes and add to dry ingredients, along with water.
  3. Stir until just mixed.  This doesn't look like your typical thinnish muffin batter.  This is thicker.  It's not pourable and must be spooned into muffin tin.
  4. Lightly spray muffin tin with non-stick cooking spray and fill cups to the top.  This will only make nine muffins, so don't even try to get 12 out of it unless you want small, flat muffins.
  5. Bake 25 to 30 minutes, until the tops of the muffins bounce back when pressed.
  6. Let stand several minutes before removing from pan.
  7. Cool completely and store in airtight container in the refrigerator.

Enjoy!

Monday, March 29, 2010

Hearty Noodle Bake

This is one of those things that's a comfort food for me.  It reminds me of the goulash my grandmother used to make, though hers was made with ground beef and white pasta.  This isn't vegan, but it is a vegetarianized version of that childhood comfort food.  Kids love this, and it's also good for them.  It's one of those dishes where you can throw in shredded veggies, and they won't even notice.

Hearty Noodle Bake

Ingredients:
  • 8 ounces whole wheat elbow macaroni, cooked to the package directions
  • 1 tsp olive oil
  • 1 cup diced onions
  • 1 cup shredded carrots
  • 3 cloves garlic, finely minced
  • 1 pound ground seitan or reconstituted TVP or a combination of the two
  • 1 1/4 cups marinara sauce
  • 1 tsp salt, divided
  • 1/2 tsp ground black pepper
  • 1 tsp dried Italian seasoning blend
  • 1/4 tsp ground red pepper
  • 1 cup unsweetened soy milk
  • 2 TBSP unbleached flour
  • 1/8 tsp ground nutmeg
  • 1 1/2 cups shredded cheese of choice (I used sharp cheddar)
Directions:

1.  Heat oil in a large pot over medium-high heat.

2.  Add onion and carrot and sauté for about five minutes.

3.  Add garlic and sauté a minute more.

4.  Add seitan (TVP) and cook five minutes more, until seitan starts to crisp up a bit.

5.  Add marinara sauce, 1/2 tsp salt, pepper, Italian seasoning, and red pepper.

6.  Cook for two minutes or until left with very little liquid.

7.  Stir pasta into beef mixture and remove from heat.


8.  In a medium saucepan over medium heat, whisk together milk, flour, nutmeg, and 1/2 tsp salt.  Cook approximately two minutes, until sauce begins to thicken, whisking continuously.

9.  Add 1 cup cheese, stirring until melted and smooth.

10.  Pour cheese mixture over pasta/seitan mixture and stir to combine well.


11.  Pour mixture into a 9 x 13 glass baking dish, lightly coated with cooking spray.

12.  Evenly cover with remaining 1/2 cup cheese.


13.  In 350° oven, bake for 15 to 20 minutes, until lightly browned.

14.  Let stand for five minutes before cutting


Enjoy!

The Sprout Project

There are about a bazillion reasons to eat sprouts, other than the fact that they taste good.  By sprouting your legumes, seeds, and grains, you make them much easier to digest, and because they are easier to digest, you absorb more nutrients.  Sprouting also ups the nutrient count of your seed (legume, grain) exponentially; sprouts are the most reliable, year round source of vitamin C.  Sprouts continue to gain vitamins AFTER you have "harvested" them.  Sprouts are a living food, and even after you have refrigerated them, they continue to grow, thus their vitamin content continues to increase.

I love sprouts, so I sprout my own.  This is a real money saver, actually.  While sprouts are not exceptionally expensive in the stores, dried seeds/beans/etc., bought in bulk, are even more economical.  They can be used exactly when you need them, and you can make exactly how much you want.  You can also mix and match to end up with a mixture of all your favorites.

I've only been doing this for a couple of months, because I always thought I needed to have fancy sprouting equipment.  I believe I've mentioned before that we operate on a budget, and I couldn't see my way clear to buying specialty equipment just to produce something only I was going to eat anyway.  Then someone told me that I don't need anything special at all.  If I could find a glass jar, some cheese cloth, and a rubber band, I'd be set.  So I made the boys peanut butter and jelly sandwiches for lunch for an entire week so that I could have the jelly jar, and then I started my very first sprouts.  I've been doing it ever since.

How to Sprout at Home:

1.  Fill clean glass jar about 1/3 full of your seeds/beans/legumes of choice.  Don't fill the jar too full.  They'll grow a lot.

2.  Cover seeds with clean cool water.

3.  Cover mouth of jar with cheese cloth and secure with rubber band.

4.  Soak seeds over night.

5.  The next morning, drain water from jar.  The cheese cloth will catch the seeds. 

6.  Fill and drain again.  Make sure to use cold water. Warm or hot water will stop the growing process and kill the sprouts.  Give the jar a few good shakes to remove as much water as possible.  You want your seeds to be damp but not swimming.  Too  much water will make the seeds spoil and rot.

7.  Prop your jar at an angle so that the excess water will continue to drain.  You can prop it against the wall on a saucer, in a bowl, whatever works for you.


8.  Cover jar with a dish towel.

9.  Rinse and drain three times a day.

10.  On the last day, remove the towel and put the jar in a windowsill to green up a bit.

11.  Dump out onto dish towel and gently pat dry before storing in the refrigerator in an airtight container.

Here I have sprouted brown lentils, red lentils, chick peas, mung beans, and quinoa.

The time it takes depends on what you're sprouting, but four or five days is the general rule.  You'll start to see small "tails" form.  When those tails are about an inch or so long, then your sprouts are probably done.  The best way to figure out when they're ready for harvest is to taste them.

You can use them in many different way:  in wraps or on sandwiches instead of lettuce, in tacos, as a salad topping, or as the salad itself.  My husband and I call the mixture above Sprout Salad, and I grow it specifically as a salad.  Sometimes I put it on top of other left over things:  red cabbage, zucchini and tomatoes, spinach, green beans, etc.  If there's nothing left over, I just dump it in a bowl and put some dressing on it.  For dressing I mist it with olive oil and either squeeze the juice of half a lemon over it or add a couple of shakes of balsamic vinegar.  My husband eats his with Italian salad dressing. 


Enjoy!

The Medicinal Smoothie

I've got stage IV endometriosis.  I do my best not to let this disease run my life, but some days it manages to land some really good punches.  Aside from the pain, those days also generally involve lots of nausea and  the need for some heavy duty prescription medications as well.  This creates something of a catch 22 type of situation.  When I'm that nauseated, the last thing in the world I want to do is eat.  However, I've got to get something into my stomach so that I can take my medication.  Medication of that caliber on an empty stomach only makes me sicker, and it generally doesn't stay there long enough to do any good anyway.  On days like this, I make what I call the Soothie Smoothie.  Yes, I do know that it's corny!

For this smoothie, you've got to get rid of the conventional ideas of what a smoothie is.  Nothing goes into the blender that isn't totally bland or specifically engineered to help with nausea.  No citrus, no dairy (if you use it), nothing that the stomach actually has to work at digesting.  Also, make sure that the ingredients aren't cold.  This is the one instance when I don't freeze my bananas first.  Room temperature is far easier on your flip-flopping stomach.

Soothie Smoothie

Ingredients:

  • 1 banana
  • Large handful fresh mint leaves
  • Medium to large knuckle fresh ginger, peeled
  • 1 1/2 -2 cups water
Directions:
  1. As always, blend the green stuff first.  So blend the mint and water until well mixed.
  2. Add ginger and blend well.  In fact, after you think it's well blended, blend it for a minute or so more!
  3. The banana goes in last.  Blend until incorporated.
This usually helps my stomach quite a bit.  Then I can get the meds in me and get on with living me life.  This smoothie is a real life saver sometimes!

Saturday, March 27, 2010

Sesame Peanut Noodles

My sister-in-law and my niece and nephew came over for a visit today.  My niece wanted to help cook something, so we embarked upon making the ever popular sesame peanut noodles.  Everyone loves these--especially the kids; they're healthy, and they're relatively easy to make.  Jenny did most of the work.  I just sorta talked her through it.


Friday, March 26, 2010

Garden Grain Burgers

This is another one of those recipes that helps use up left overs.  There's always left over rice and/or quinoa here, so creative and yummy ways to use it are always appreciated.

Garden Grain Burgers

 Ingredients:
  • 1 1/2 cups cooked brown rice (or a combination of rice and quinoa, but no more quinoa than 50%, or they won't hold together properly)
  • 1 cup grated carrots (zucchini works well too)
  • 1/4 cup wheat germ
  • 2 cloves pressed, or finely minced, garlic
  • 1/2 onion, grated
  • 1 tsp seasoned salt
  • 1/2 cup whole wheat flour
  • 1 tsp baking powder
  • 2 TBSP olive oil
  • 2 egg replacers (I used the flax seed method, but feel free to use your replacer of choice)
  • 1/4 cup nutritional yeast
  • 1/2 cup spinach leaves, chopped
  • 1/4 tsp ground thyme
Directions:

1.  Mix ingredients in mixing bowl.


2.  Measure out 1/3 cup for each patty.

3.  Form into a four to five inch patty.

4.  Heat non-stick skillet over medium heat and lightly spray with cooking spray.

5.  Add three patties to skillet.


6.  Add a tablespoon of water to skillet and cover. 


7.  Cook each side for four minutes, adding another tablespoon of water upon flipping.

8.  Let patties rest for five minutes before eating.


Makes eight burgers.  They can be made in advance and frozen.  They reheat well straight from the freezer in the microwave, oven, or on the stove top.  However, they don't grill well.

I don't have any pictures of them on the buns with condiments and stuff, because they boy made them disappear really quickly!

Enjoy!

Quinoa Salad

I love quinoa.  I can use it in everything from main dishes to side dishes to breakfast to desserts.  This means that I generally have leftovers, and I'm all about using up all of the leftovers.  We don't waste food in this house.  We operate on a budget, and I've lived in the 3rd world.  That changed pretty much everything about how I see ... well, everything.

 
Anyway, moving on.  One of my favorite things to do with left over quinoa is to turn it into a bright and healthy salad.  What you add is pretty much up to you.  This is what I did.

 
Leftover Quinoa Salad

 
Ingredients:
  • 1/2 to 3/4 cup cooked quinoa
  • 1/4 cup chopped zucchini
  • 1/4 cup diced onion
  • 2 cloves garlic, finely minced
  • 1 tomato, chopped
  • 1/2 lemon
  • Olive oil
  • Salt and pepper
 Directions:
  1. Combine all ingredients in bowl
  2. Mist with olive oil
  3. Squeeze juice of lemon into bowl
  4. Mix well and add salt and pepper to taste.


Enjoy!

Thursday, March 25, 2010

Keeping Produce Fresh

I buy produce like it's going out of style.  I buy large amounts pretty much every time we go grocery shopping.  I've found a local Hispanic market that makes doing this easy and economical.  I can get literally almost six times the produce that I can from the grocery store for the same price.  We generally manage to go through it all before it goes bad too.  One of the things that has helped a lot is that I learned how to properly store it to best extend its life.

When storing produce in the refrigerator, keep fruits and vegetables in separate drawers.  They both spoil faster if you keep them together.  This is because of the ethylene that builds up.  Keep your produce in perforated plastic bags in the crisper drawers.  There's no need to buy fancy bags; you can perforate your own by poking them with something sharp.  Store everything unwashed.  Wash it as you go.

The following items should be stored in the refrigerator:
  • Apricots
  • Artichokes
  • Asparagus
  • Beets
  • Blackberries
  • Blueberries
  • Broccoli
  • Brussels sprouts
  • Cabbage
  • Cantaloupe
  • Carrots
  • Cauliflower
  • Celery
  • Cherries
  • Corn
  • Figs
  • Grapes
  • Green beans
  • Green onions
  • Herbs, with the exception of basil
  • Honeydew
  • Lima beans
  • Leafy vegetables
  • Leeks
  • Lettuce
  • Mushrooms
  • Okra
  • Peas
  • Plums
  • Radishes
  • Raspberries
  • Spinach
  • Sprouts
  • Strawberries
  • Summer squash
  • Yellow squash
  • Zucchini
Store these things on the counter top:
  • Apples
  • Bananas
  • Basil
  • Cucumbers
  • Eggplant
  • Garlic
  • Ginger
  • Grapefruit
  • Jicama
  • Lemons
  • Limes
  • Mangoes
  • Oranges
  • Papayas
  • Peppers
  • Persimmons
  • Pineapple
  • Plantains
  • Pomegranates
  • Tomatoes
  • Watermelon
There are several items that should be ripened on the counter top and then stored in the refrigerator:
  • Avocados
  • Nectarines
  • Peaches
  • Pears
  • Plums
  • Kiwis
And lastly, these foods should be stored in a cool, dry place:
  • Acorn squash
  • Butternut squash
  • Onions
  • Potatoes
  • Pumpkins
  • Spaghetti squash
  • Sweet potatoes
  • Winter squash
Potatoes and onions must be stored separately, also because of ethylene build up.
There you have it.  If you store things in the proper manner, you'll get the longest life possible for your produce, and it will be money well spent instead of money tossed away.

Cheesy Cheddar Crackers

I found this recipe all over the internet, but as near as I can tell, it originated at Country Living.  These crackers are so good!  They are light and airy and not greasy at all.  They've got flaky pockets inside, kind of like goldfish crackers.  I cannot say enough good things about these crackers, and that's saying a lot, because I don't really like cheddar cheese.  I made them because my husband asked vehemently.  Several times.  I was pleasantly surprised.

 
The recipe says that you should roll these out directly onto the baking pan.  Well obviously, I don't have enough talent to do that.  I tried.  It went much better when I gave up and rolled them out on a floured counter top.  Also, I had never worked with chilled dough before, and I didn't expect it to be so hard to work with.  I wasn't able to get them quite as thin as they are supposed to be.  Some of them turned out very cracker-like, and others turned out more like tiny cheddar puff-pastries.  Interestingly enough, I liked the puff-pastry like ones the best.

 
So things I learned for next time: 
  1. Remove dough from refrigerator and let sit on counter top for about 20 minutes before rolling out. 
  2. Do not try to roll out without flouring surface first.
  3. Roll between parchment paper so that I can get them thinner.
  4. I need a bench scraper
  5. I could also use some little cookie cutters.
These are not a low calorie snack, but they are a good for you snack, and they're quite satisfying.  I did the math on the calorie count, because I'm anal that way.  They are not significantly less in calories than actual goldfish crackers; there are only four less calories in the home made version for the same serving size as in goldfish.  However, it's not about saving calories.  It's about not eating added crap that you don't need.  The home made version has FOUR ingredients.  The commercial version has those ingredients plus sunflower, canola, and soybean oil, annatto, autolyzed yeast, sugar, and monocalcium phosphate.  I don't need all of that stuff.  Heck, I don't even know what a lot of that stuff IS!

 
Cheesy Crackers

 
Ingredients:
  • 1 cup all-purpose flour
  • 3/4 tsp salt
  • 1/2 tsp ground pepper (optional)
  • 4 TBSP cold unsalted butter, cut into small pieces
  • 8 ounces grated cheddar cheese
  • 3-4 TBSP water

 Directions:

 
1.  Pulse the flour with the salt and pepper in food processor

 
2.  Add butter and pulse until the mixture resembles coarse meal.

 
3.  Add grated cheese a little at a time until the mixture again resembles coarse meal.

 
4.  Pulse in 3 to 4 tablespoons of water, one tablespoon at a time, and only enough so that the dough forms a ball and rides the blade.

 
5.  Remove, wrap in plastic, and chill for 20 minutes or up to 24 hours.  (Leave for as long as you can, as well chilled dough puffs more in the oven.)


6.  Roll the dough out to 1/8th-inch thickness directly onto a baking sheet.

 
7.  Using a knife or pizza cutter, cut 1 inch squares.

 
8.  Bake at 350° for 15-20 minutes or until crackers are golden brown.  Watch them closely after ten minutes.

 
(Note that these aren't uniform in size.  Or in shape.  My sixth grade shop teacher once told me that everything I cut looked like someone cross-eyed cut it.  Well, I'm not cross-eyed, but I am left handed!  THIS is why I could use some little cookie cutters.)

 
 9.  Remove from oven and cool completely.

 
Store in an airtight container for up to one week or freeze.
These will NEVER last a week in this house!

 
Enjoy!

Non-Dairy (Cashew) Coffee Creamer

I am doing pretty well in my endeavor to eliminate all dairy from my life.  However, I don't want to simply replace all of it with soy either.  I drink soy milk, and I eat soy yogurt, so I needed another solution for coffee creamer.  With a bit of research, the cashew coffee creamer was born.

They will tell you that you must use whole cashews for this, that pieces won't work, blahblah.  They are also wrong.  I buy raw cashew pieces in bulk, and they work just fine for this purpose.  The soaking part is essential.  You must soak them so that they plump up and blend nice and creamy.

You will note, from my pictures, that while my blender is quite good enough, it's also not a Vitamix.  It's almost sacrilege to be a vegetarian and not own a Vitamix.  So if anyone sees the Vitamix fairy, send her my way, because there's just no way we can pay $650.00 for a blender.

Speaking of my pictures, please excuse the crappiness of them today.  I don't know what went wrong, but I obviously should have turned on the flash.  It's pretty cloudy outside.

Cashew Coffee Creamer


Ingredients:
  • 1/4 to 1/2 cup raw cashews (I use 1/4 cup.  I'm the only one in the house who drinks coffee, and I don't drink it every day.)
  • Water
  • Vanilla
  • Dash Cinnamon
  • Dash Cloves
Directions:


  1. Soak cashews AT LEAST eight hours, preferably over night
  2. Rinse cashews and put into blender with fresh water to cover.  How much water depends on personal taste.  The more water the thinner it will be.  I use enough to cover the nuts by about an inch.
  3. Add cap full vanilla
  4. Add dash of cinnamon
  5. Add dash of cloves
  6. Blend until liquefied and smooth
  7. If you don't have a Vitamix, you may want to strain it through a fine mesh strainer


The flavoring is obviously up to personal interpretation.  You can use vanilla extract, almond extract, allspice, nutmeg, chocolate shavings or cocoa powder--whatever you like.
I'm a real fan of my little bottle of perpetual vanilla.  I got that for Yule two years ago at a grab bag gift exchange kind of thing.  The people who brought it were amused at my delight and joked that they were trying to be cheap.  It remains, however, one of the best gifts I've ever received.
Enjoy!

Wednesday, March 24, 2010

Five Grain Bread

This isn't necessarily fast or easy (though if you've got a decent food processor, it can do a great deal of the work; if you don't have a decent food processor, then what's wrong with you?  Go get one!), but it's certainly good.  Even the husband likes it, and he's not so much with the grains.  This is originally a Country Living recipe, but I've adapted it to make it vegan.  It didn't take much adaptation at all, and the resulting loaf is amazing.  It makes a HUGE loaf with a dark chewy crust and light airy inside. It is quite yummy, and everyone loves it.  In fact, Drew requested this particular loaf, so here it is.

Five Grain Bread

Ingredients:
  • 2 1/2 cups bread flour (If, like me, you don't tend to have bread flour on hand, you can use regular all purpose UNBLEACHED flour plus one tablespoon of wheat gluten per cup of flour.)
  • 1 cup whole wheat flour
  • 1/4 cup coarse cornmeal
  • 1/4 cup old-fashioned rolled oats
  • 1 tablespoon old-fashioned rolled oats
  • 1/4 cup wheat germ
  • 1/4 cup cooked brown rice (can use cooked quinoa instead)
  • 1/4 cup vegan brown sugar, packed
  • 2 1/2 teaspoons instant active dry yeast
  • 2 teaspoons salt
  • 2 tablespoons agave nectar
  • 1/2 cup "buttermilk", warmed to 100 degrees (Once again, if like me you don't tend to have buttermilk on hand because you think it's a vile vile creation and you don't drink dairy anyway, you can make your own--It's one tablespoon white vinegar or lemon juice to one cup milk. I used white vinegar and organic soy milk.  Be sure to let it sit for about five minutes before you use it.)
  • 3/4 cup (add more as needed) spring water, warmed to 100 degrees
  • Olive oil for coating bowl
  • Olive oil or soy milk for brushing loaf
Directions:

Make the dough:

1.  In a large bowl or food processor fitted with metal blade, combine the flours, cornmeal, 1/4 cup oats, wheat germ, rice, sugar, yeast, and salt.

2.  In a small bowl, combine the agave and buttermilk and stir into the dry mixture with a wooden spoon, or pulse into a course meal with the food processor.  It should look like this when it's mixed correctly.


3.  Using a wooden spoon to mix by hand, add the water 1/4 cup at a time until a stiff dough comes together, or process until dough comes together and rides around the bowl with the blade.  Add the water SLOWLY.


4.  On a work surface lightly dusted with whole-wheat flour, knead dough by hand until glossy and elastic, about 10 minutes, or process in food processor for 45 more seconds.

Proof the dough:

1.  Coat a large bowl with the vegetable oil.  It doesn't take much--just lightly mist the bowl.

2.  Shape dough into a ball and place in the bowl, turning dough to coat all sides.

3.  Cover bowl with a clean, damp kitchen towel and let rise in a warm, draft-free place until doubled in size, 1 to 11/2 hours.  (Because my house is really freaking cold, bread does not rise properly just on a counter top.  I turn on the oven light and let it rise in there.  It works like a charm every time!)
 
Form the loaf:

1.  Punch down the dough and shape into a tight ball.

2.  Return dough to the floured surface, cover, and let rest for 10 minutes.

3.  Sprinkle a baking sheet with cornmeal.

4.  Shape the dough into a 10-inch oval, tapering the ends, and place on the baking sheet.


5.  Cover with damp kitchen towel and let rise in a warm, draft-free place until doubled in size -- about 1 hour.
 
Bake the bread:

1.  Preheat oven to 350 degrees.

2.  Mist loaf with olive oil or brush with soy milk.

3.  Sprinkle with remaining tablespoon rolled oats.

4.  Using a sharp knife, cut 3 diagonal slashes in the top of the dough.


5.  Bake in the lower third of the oven until the loaf is golden brown and sounds hollow when lightly tapped--50 to 60 minutes.

6.  Cool on a rack.

Serve at room temperature or toasted.
Store in an airtight container.


Enjoy!

Tempeh Bacon

I've got an undying love for tempeh.  I could eat it every single day of my life, and I'm always looking for new ways to prepare it.  Thus the TLT was born!

Tempeh Bacon


Ingredients:
  • 1/2 block tempeh
  • 2 TBSP maple syrup
  • 1 TBSP olive oil
  • 1/2 tsp cumin
  • dash cayenne
  • 1 TBSP liquid smoke
  • 1 tsp soy sauce
  • 1/2 tsp black pepper
  •  Olive oil for pan
Directions:
  1. Very thinly slice tempeh
  2. Combine all ingredients in a shallow dish
  3. Soak tempeh in marinade for 30 minutes
  4. Turn sauté pan on high and mist with olive oil
  5. Lay tempeh flat on skillet in a single layer
  6. Drizzle excess marinade onto skillet
  7. Cook for one minute and then flip
  8. Cook for another minute until both sides are crisped and brown
  9. Cool on parchment paper
Put it on some nice whole grain bread with a fresh tomato and some Romain lettuce, and voilà, a quick, easy, tasty, very healthy lunch option!


Enjoy!

Green Smoothie

Today's green smoothie is actually an official green smoothie, as I went to the store to get some leafy greens.  The semi-green smoothie was pretty healthy, but not nearly as healthy as having a nice large dose of those dark leafy greens!

Green Smoothie:

 Ingredients:

  • 2 cups spinach, tightly packed
  • 1/4 large zucchini, roughtly chopped
  • 1 cup water
  • 1/4 frozen banana
  • Mediumish sized chunk of frozen passion fruit pulp
  • Pineapple chunks
  • Orange segments
  • 1 TBSP wheat germ
  • 1/4 cup whole grain oats
  • Sweetener of choice, if desired

Directions:

  1. Place zucchini, spinach, wheat germ, and water in blender and blend until liquefied, stopping to push down spinach with spatula if needed (or you can be a big dork like me and push it down with your fingers. Whatever).
  2. Add banana, pineapple, oranges, passion fruit pulp, and oats to blender, and blend again until smooth, adding water to reach desired consistency.

Enjoy!

Tuesday, March 23, 2010

Throw It Together Mexican Casserole with Baked Tortilla Chips

I like recipes that are easy, use up left overs, and that everyone in the house will eat, which isn't exactly easy since everyone (else) in the house is really very picky! This one dish recipe fits the bill.

Mexican Casserole

Ingredients:
  • 1 cup cooked rice
  • 1 package veggie crumbles OR 2-3 cups well-cooked beans of your choice OR 1 lb equivalent reconstituted TVP
  • 1 cup egg beaters OR four eggs OR equivalent egg replacer
  • 2 packets taco seasoning
  • 1 cup salsa
  • 1 cup shredded cheese
  • oil or cooking spray to coat baking dish
 Directions:
  1. Preheat oven to 350°.
  2. Combine all ingredients (using half of the cheese) and mix thoroughly.
  3. Pour mixture into greased casserole dish and cover with remaining cheese.
  4. Bake covered for 45 minutes.
  5. Remove cover and bake for an additional 15 minutes.
  6. Let sit for 5 minutes before serving.
 For the tortilla chips:

       1.  Preheat oven to 350°.
       2.  Mist both side of the tortilla (I use corn) with olive oil. 
       3.  Cut into four pieces.
       4.  Place on baking sheet and lightly salt.

       5.  Bake for ten minutes.
       6.  Turn chips over and bake for five more minutes.
       7.  Remove from baking sheet and cool completely.

That's it, and you have tortilla chips that haven't been fried and have 3/4 less calories and fat the the pre-packaged kind.  


Serve your casserole and chips with a veggie or green salad, and dinner is served!

Enjoy!

Semi-Green Smoothie

I'm a huge fan of the green smoothie.  It's my standard breakfast fare.  I had never been much of a breakfast eater, really, but when I started on my journey toward health, I learned that I really do have to eat breakfast.  Every day.  A smoothie is the perfect thing for me.  It almost seems like a cheat.  I'm getting a TON of good stuff in my body, and it's like I'm not really eating anything at all.  It also seems like a cheat in that I don't drink my calories, unless they come in meal form.  So yay for the breakfast that doesn't really require "eating" and for liquid calories to boot!

Most people don't get enough vegetables, especially greens, in their diet.  The green smoothie is the perfect way to sneak them in there.  Blending them also breaks down the cellulose and makes the greens far easier to digest.  You can take it wherever your imagination takes you, adding kale, spinach, Romain, any number of fresh herbs, etc. to your fruit(s) of choice.  I also always add wheat germ and rolled oats to my smoothies, no matter what else goes into them.  Wheat germ is fantastically healthy.  It has more nutrients per ounce than any other vegetable or grain.  Oats also have a huge amount of health benefits, and the fiber helps make you feel fuller longer.


The general rule of thumb is the 60/40 rule.  As long as you keep you use 60% fruits and 40% vegetables, you can barely taste the vegetables, making it a perfect way to get the kids to eat their veggies, as well.  I've been doing the green smoothie thing for so long that I've reversed the equation and use 60% veggies to my 40% fruit.  My go-to greens of choice are spinach, sprouts, and fresh mint.  Yesterday morning, I somehow didn't have any of these, so I improvised.

The Semi-Green Smoothie

Ingredients:
  • 1/4 large zucchini, roughly chopped
  • 2 large leaves Romain
  • 1 cup water
  • 1/4 frozen banana
  • Mediumish sized chunk of frozen passion fruit pulp
  • Pineapple chunks
  • Orange segments
  • 1 TBSP wheat germ
  • 1/4 cup whole grain oats
  • Sweetener of choice, if desired (I find that the fruit makes it plenty sweet enough)

Directions:
  1. Place zucchini, Romain, wheat germ, and water in blender and blend until liquefied.
  2. Add banana, pineapple, oranges, passion fruit pulp, and oats to blender, and blend again until smooth, adding water to reach desired consistency.

Enjoy!

Sunday, March 21, 2010

Learning as I Go

I've been toying with the idea of having a food blog for quite some time, but I wasn't really sure how to start.  I guess that "just start" is the best answer.  In 2005 I was 75 pounds heavier than I am now.  I smoked.  I drank.  A lot.  Don't let anyone tell you that there's no such thing as a fat vegetarian, because I certainly was.

I had something of an epiphany one day, and I decided that I needed to get healthy.  Healthy.  Not thin.  The weight loss was not the primary goal, but it was a very nice side effect.  I stopped smoking.  I quit drinking like a weekend warrior alcoholic wannabe.  I got up off my butt and started to exercise, and I learned to eat.  I think the learning to eat was the hardest part.

I knew precious little about nutrition.  I knew how to feed my body, but I didn't know how to nourish it.  I had been a vegetarian for seven years by the time I decided that I needed to educate myself on how to eat and on how to be healthy.  The reasons I became a vegetarian are many, and they also don't matter for the sake of this blog.  I have no desire to start a debate.  I'm a vegetarian; that's a fact, and my recipes will be meat free.  Many of them will be free of any animal products.  If you aren't veg*n, that doesn't make these recipes any less nutritious or tasty.

Surprisingly enough, I really don't like to cook.  It's not something I find fun or relaxing or stimulating or any of the plethora of things I've heard people say about cooking.  I'm not good at making up recipes on the fly.  I tend to need step by step instructions in order to produce something edible.  I cook because I need to eat, and I put effort into cooking, because I care about what goes into my mouth.  Somewhere along the way in this journey toward health, I became something of a hippie.  I strive to keep pre-packaged, processed foods full of additives and ingredients I can't pronounce out of my diet.

I'd love it if you all would share my journey with me.  Welcome.  Come on in and stay awhile.
Related Posts Plugin for WordPress, Blogger...